Hiring an experienced offshore contractor can give your business access to valuable skills and additional capability.
But even a highly experienced professional needs the right introduction to your business before they can contribute effectively.
Good onboarding is not about teaching experienced professionals how to do their jobs. It is about giving them the context, access and clarity they need to do those jobs well.
That distinction matters.
When onboarding is rushed, contractors can spend their first few weeks searching for information, waiting for access or trying to work out what success looks like. When onboarding is structured, they can understand the business, build relationships and begin taking ownership with greater confidence.
The goal should not be to explain everything on the first day. It should be to create a clear journey from introduction to ownership.
This practical 30-day guide will help you onboard an offshore contractor thoughtfully while maintaining the flexibility and independence appropriate to a contractor relationship.
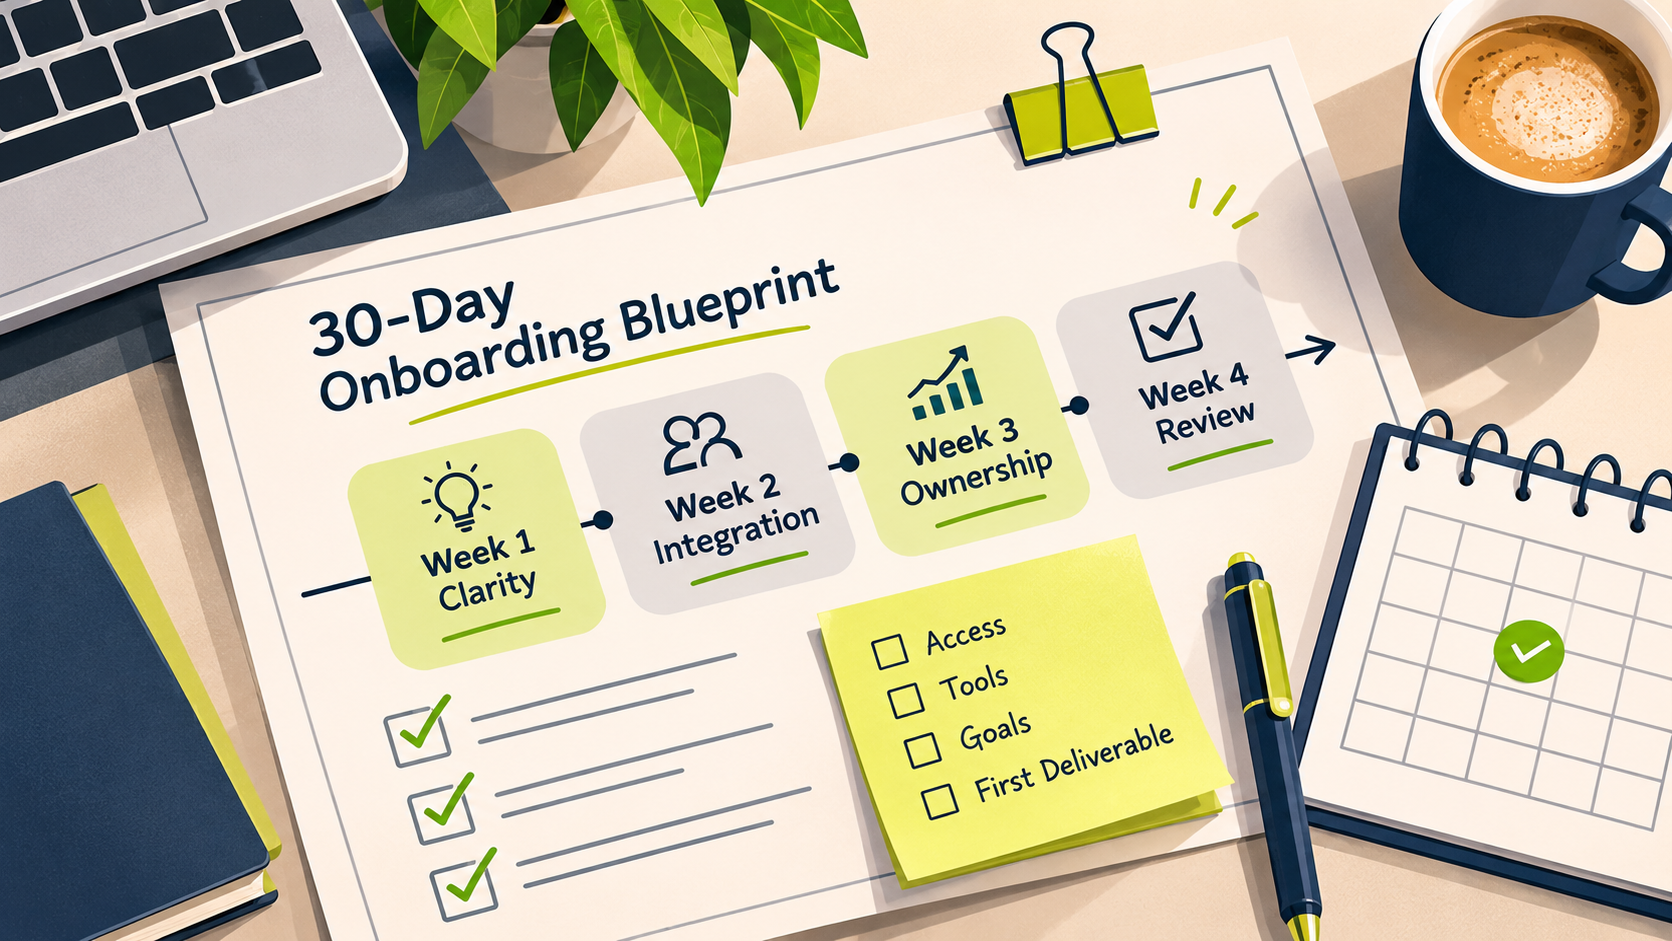
The First 30 Days
From onboarding to ownership.
-
Week 1
Clarity
Understand the business, expectations and priorities.
-
Week 2
Integration
Build working relationships and communication rhythms.
-
Week 3
Ownership
Take responsibility for agreed outcomes.
-
Week 4
Review
Evaluate progress and plan the next steps.
Before Day One: Prepare the foundations
A successful onboarding experience begins before the contractor logs in for the first time.
Start by defining the role clearly. What outcomes will the contractor be responsible for? Which tasks or processes will sit within their scope? What should they understand by the end of their first week, and what would meaningful progress look like after 30 days?
Avoid relying on a broad list of duties alone. A title such as “Marketing Assistant” or “Customer Support Contractor” does not explain which priorities matter most to your business.
Instead, identify:
- The main purpose of the role
- The first priorities or deliverables
- The systems and tools the contractor will use
- The people they will work with
- Who can answer operational questions
- How progress and completed work will be communicated
- Any important boundaries or approval requirements
Prepare system access before the agreed start date wherever possible. This may include email, project management software, shared drives, communication platforms, customer service systems or other tools relevant to the work.
Only provide access that is genuinely required. Use individual accounts rather than shared credentials, enable multi-factor authentication where available and document any relevant data-handling or security expectations.
You should also prepare a short collection of essential information. This could include an organisational overview, key contacts, brand guidelines, process documents, examples of completed work and a glossary of business-specific terms.
The aim is not to create an enormous handbook. It is to give the contractor a useful starting point.
Week 1: Create clarity
The first week should focus on context.
Introduce the contractor to the business, its customers and the reason their role exists. Explain what the company does, who it serves and how the contractor’s work contributes to wider business priorities.
An experienced professional may already understand the discipline itself. A bookkeeper understands bookkeeping. A marketer understands campaigns. A customer support professional understands how to assist customers.
What they do not yet understand is your business.
They need to learn how decisions are made, what your customers expect, which priorities are most important and where their responsibilities connect with the rest of the team.
During the first week:
- Walk through the role and its intended outcomes
- Confirm the immediate priorities
- Introduce the contractor to key team members
- Review the tools and information they can access
- Explain important workflows and approval points
- Share examples of work that meets your expectations
- Agree how questions should be raised
- Confirm the communication rhythm
Be explicit about what is urgent, what is important and what can wait. Businesses often assume that priorities are obvious because the team has worked with them for months or years. A new contractor does not have that history.
It can be helpful to give the contractor one contained first assignment. Choose something meaningful enough to show how the business operates, but limited enough that it can be reviewed and discussed without creating unnecessary risk.
The purpose is not to test whether they can work under pressure. It is to build shared understanding.
Week 2: Build integration
By the second week, the contractor should have a clearer understanding of the role and the business. The next step is to help them become part of the working rhythm.
Integration does not require filling their calendar with meetings. It means ensuring they know who is responsible for what, where information lives and how work moves through the business.
Confirm practical communication expectations. For example:
- Which channel should be used for everyday questions?
- Where should tasks and deadlines be recorded?
- When is a meeting more appropriate than a message?
- Who provides approvals or final decisions?
- How should blockers be raised?
- Are there agreed collaboration hours or response windows?
Offshore contractors may work across different time zones. Some will align their working hours with the client, while others may have a partial overlap or a more flexible arrangement. The appropriate schedule should be agreed in advance and reflected in the contractor arrangement.
Avoid treating constant availability as proof of commitment. Focus instead on agreed deliverables, clear communication and dependable follow-through.
Week two is also a good time to explain the unwritten details that influence how the team works. This might include communication preferences, recurring customer concerns, seasonal priorities or previous decisions that shape current processes.
These details help a contractor understand not only what happens, but why.
Week 3: Encourage ownership
During week three, begin moving from guided onboarding towards greater ownership of agreed responsibilities.
Ownership does not mean leaving the contractor without support. It means giving them enough information and authority to make progress within the scope of their role.
Review the work completed so far and identify the areas they are ready to manage more independently. Clarify which decisions they can make, which actions require approval and when they should escalate an issue.
At this point, you might ask the contractor to:
- Manage a recurring process
- Take responsibility for an agreed deliverable
- Recommend an improvement to an existing workflow
- Identify missing information or documentation
- Flag recurring blockers
- Suggest a clearer way to track progress
An experienced contractor can often see gaps that are difficult for an established team to notice. Invite their observations without expecting them to redesign the business immediately.
Be open to questions and suggestions, but keep priorities focused. Too many new responsibilities at once can create confusion about what the contractor is actually expected to own.
Provide feedback that is specific and useful. Instead of saying that something “isn’t quite right”, explain what needs to change and why. Where possible, show an example or connect the feedback to an agreed outcome.
Good feedback helps the contractor adjust to your business. It should not require them to guess what you meant.
Week 4: Review and plan the next steps
The final week of the first month is an opportunity to review the onboarding experience and agree what comes next.
This does not need to be a formal performance appraisal. The contractor is not an employee, and the relationship should continue to reflect the agreed independent contractor arrangement. However, both parties still benefit from a structured conversation about progress, expectations and support.
Review:
- What the contractor has completed
- Which responsibilities now feel clear
- Where further context or access is needed
- Any blockers affecting delivery
- How well the communication rhythm is working
- Which responsibilities they can own next
- Priorities for the following 30 to 60 days
Ask the contractor what would help them work more effectively. They may need clearer documentation, faster approvals, access to another system or more context about an upcoming priority.
This is also a useful point to review scope. If the work has changed significantly from the original agreement, discuss and document the change rather than allowing responsibilities to expand informally.
End the first month with a clear plan. Confirm the next priorities, expected outcomes and any follow-up actions for both the contractor and the business.
The first 30 days should create a foundation for effective collaboration—not mark the end of communication and support.
Practical action plan
Your 30-Day Offshore Contractor Onboarding Checklist
Use this checklist to keep practical onboarding actions visible. Adapt it to the contractor’s role, scope and agreed working arrangement.
Common offshore onboarding mistakes
Giving access too late
A contractor cannot make meaningful progress if they spend their first week waiting for accounts, documents or approvals. Prepare the essentials before their start date.
Sharing tasks without context
A task list explains what to do, but not why it matters. Explain the intended outcome, relevant background and how the work will be used.
Assuming experience removes the need for onboarding
Experience reduces the need for basic skills training. It does not remove the need to understand your customers, systems, preferences and priorities.
Overloading the first week
Trying to explain every tool, process and future responsibility immediately can make it harder to retain the information that matters most. Introduce information in stages.
Creating unnecessary meetings
Regular communication is valuable, but constant meetings can interrupt the work you hired the contractor to complete. Use meetings deliberately and document decisions.
Treating a contractor like an employee
Independent contractors and employees are different working arrangements. Avoid introducing employee-style controls or expectations that conflict with the agreed contractor relationship. The contract, working practices and applicable laws should remain aligned. Obtain appropriate professional advice where necessary.
Expanding the role without discussing scope
Business needs can change, but additional responsibilities should not simply accumulate. Discuss material changes and update the agreed scope, priorities or commercial terms when appropriate.
Build a stronger working relationship from the start
A thoughtful onboarding process creates the conditions for an experienced offshore contractor to contribute effectively.
They do not need every answer on day one. They do need clear priorities, appropriate access, useful context and a reliable way to ask questions and receive decisions.
Use the first 30 days to move gradually from clarity to integration, from integration to ownership, and from ownership to a shared plan for what comes next.
The strongest offshore working relationships are built when both sides understand their responsibilities. The contractor brings experience, judgement and capability. The business provides direction, context and the foundations required to apply those strengths well.